This blog is all dedicated to Cricut infusible ink transfer sheets. You will learn what this is, how to use them, and additional tips to use it. Infusible ink can be a new heat transfer product for you. Infusible ink is a Cricut product that helps you get professional quality heat transfer projects in no time. In simple words, the ink infuses with your project and is not a physical layer of material that needs to stick as a layer of adhesive.
The infusible ink absorbs into your project. It permanently infuses your material and provides a smooth image. It’s easy to use, and the project gets no bumps or texture. The project you get is smooth and bright, and the ink sticks to it permanently and long last, even after washing. Let’s move to the infusible ink transfer sheets.
What Are Cricut Infusible Ink Transfer Sheets?
Cricut infusible sheets contain infusible ink that works with your Cricut machine. These are pre-printed sheets. They need to be loaded into the Cricut machine, similar to any other material, and the machine works by cutting the design. After this, you will be required to press the transfer sheets with a heat press. While applying the heat, the ink will leave the transfer sheet and get permanently infused into your material or the project.
The infusible sheets are available in a variety of colors and printed designs. Hence, you have a lot of choices when it comes to buying one.
What Is The Mechanism Of Infusible Ink Transfer Sheets?
Well, the working of infusible ink transfer is very simple and interesting. The infusible ink sheets have the colored ink on the paper in a solid state like any standard ink. However, the infusible ink is a little different. When you apply heat to it, a chemical reaction occurs that converts the ink into a gas. The ink moves away from the transfer sheet and gets infused into your project during this process.
After the heat is removed and the project cools, the infusible ink becomes solid again. Finally, your project gets infused with the design you want. But one thing to note is that the infusible ink transfer sheet works best on certain materials. For instance, fabric or poly-coated ceramic coasters. Thankfully, Cricut has enough blanks that are compatible with the infusible ink. Some available blanks are tote bags, T-shirts for men, women, kids, babies, and coasters.
Which Cricut Machines Are Compatible With Infusible Ink Transfer Sheets?
The Cricut Maker, Cricut Explore, and Cricut Joy machines are compatible with infusible ink transfer sheets. Also, you can use any Cricut blank with infusible ink transfer sheets to make T-shirts for men, women, kids, or babies.
How To Use The Cricut Infusible Ink Transfer Sheet?
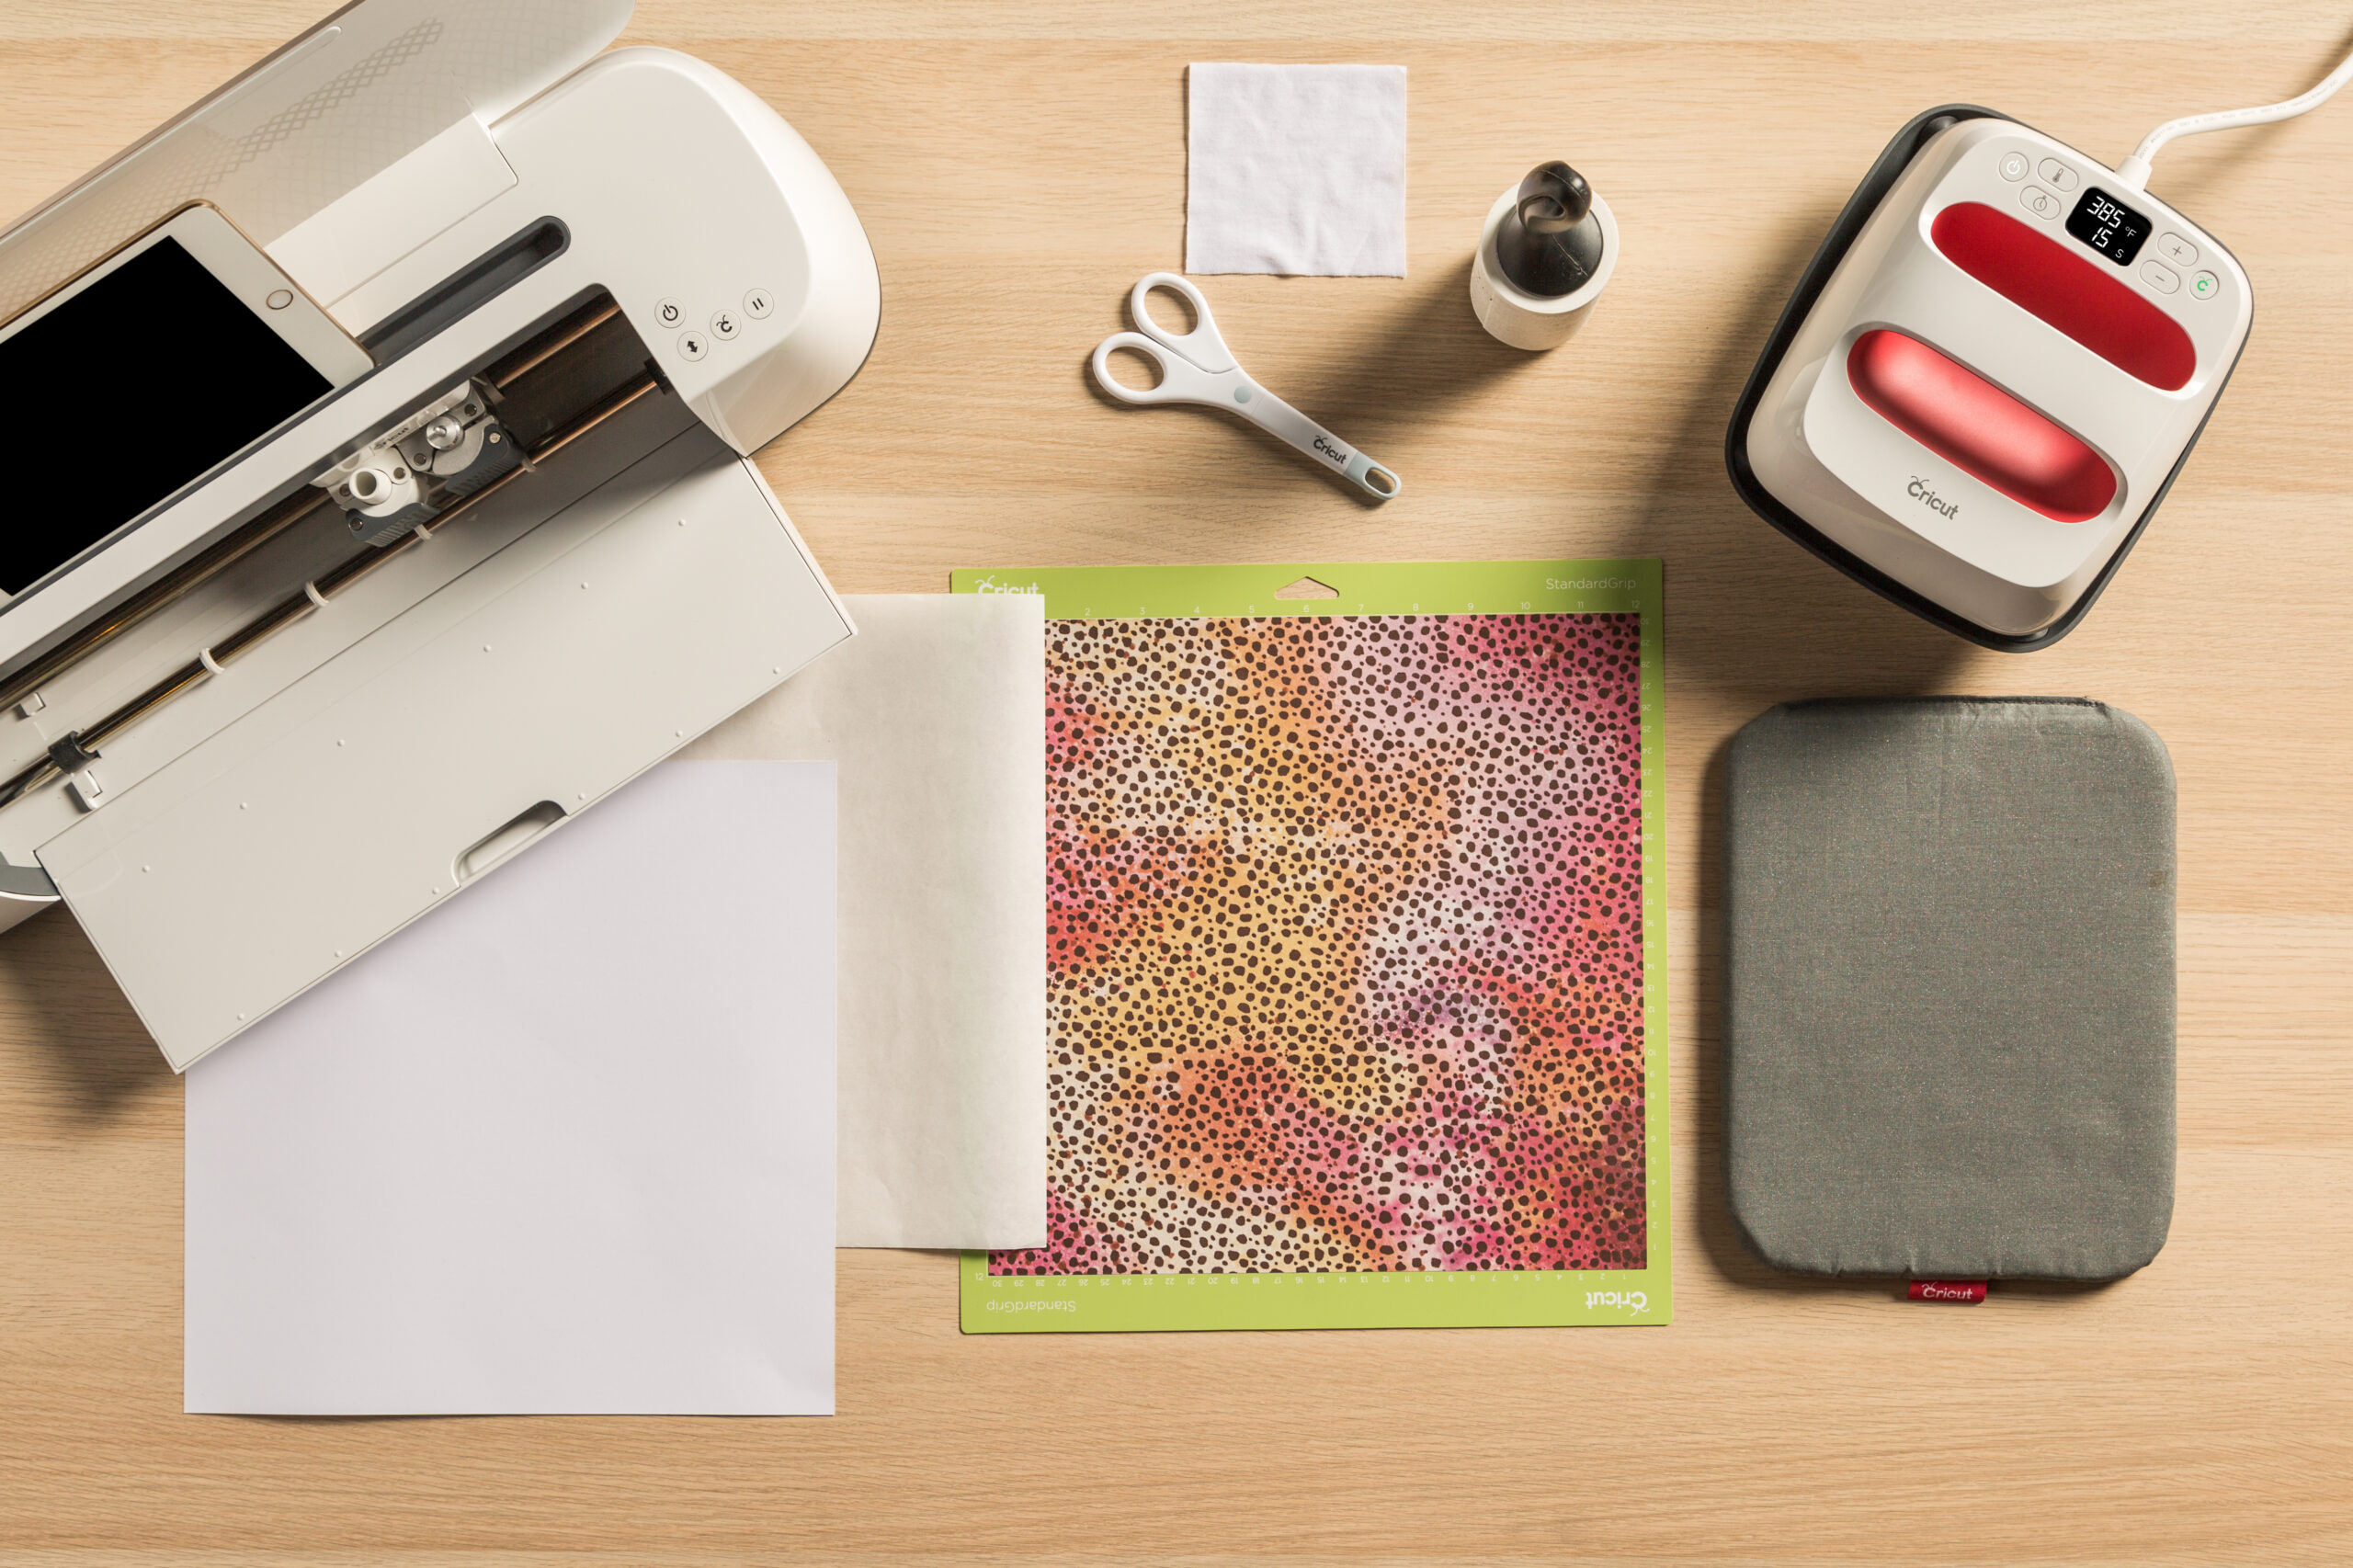
Here are the step-by-step instructions to use the infusible ink transfer sheet on your project. But before that, let’s see what you need to have while making the project.
- Cricut cutting machine
- Design Space on your system
- Cricut heat guide/Cricut heat app for Cricut EasyPress 3
- StandardGrip machine mat
- Cricut EasyPress mat
- Cricut apparel blank
- Infusible ink transfer sheet
- Butcher paper
- Lint roller
- Scissors
- Tweezers
Once you have collected everything mentioned above, you can move to make your project out of it. Note that your hands are dry and oil-free.
Cut
Follow the steps to cut your material:
- Load the infusible ink transfer sheet on the StandardGrip mat.
- In your Design Space software, choose your design and adjust its size to make it fit onto the apparel blank. Make sure to mirror the design in the case of the Cricut Joy app. The mirror function is automatic in Cricut Joy after selecting a heat-transfer material.
- Then, select an infusible ink transfer sheet from the material list. If you are using a Cricut Explore machine, then change Smart Set Dial to custom.
- Insert mat and blade into your machine and press Go.
Weed
After cutting, the next step is to remove the unused area or the extra sheet. Here are the steps to do this:
- First, remove the cut design from the Cricut mat and cut the unused area of the sheet.
- Carefully roll out the design to separate cut lines. You can also crack the cut to remove the extra paper easily from your design part.
- Then, you use fingers or tweezers to take off the stuck pieces in and around your design, keeping the design on the liner.
- Now, trim clear the liner to prevent it from getting beyond the Cricut EasyPress heat plate.
Prepare Your Blank
This is a good time to prepare your Cricut EasyPress. Always prefer the Cricut Heat Guide or Cricut Heat app to adjust the correct temperature, time, and pressure. Follow the instructions below.
- Put the Cricut blank onto your Cricut EasyPress mat.
- Then, place a sheet of cardstock inside your Cricut apparel.
- Prefer a new adhesive to lint-roll the full surface. This is to remove the fibers and debris particles for a better final transfer.
- Then, put butcher paper on the apparel.
- Don’t forget to pre-heat the apparel to remove the moisture or wrinkles that may ruin your design. Pre-heat with light pressure.
- At last, take off the butcher paper from the apparel and let it cool.
Apply
This is the final step, as now your design will be transferred to the blank material. Apply the heat by following the given steps.
- Put the cut design onto the apparel.
- Then, cover the design with a large butcher paper.
- Refer to the Cricut Heat Guide to select your project’s accurate time and temperature.
- As the beep sounds, gradually lift your Cricut Press. Let the stack and butcher paper in place.
- Apply heat and let it cool once the time is off.
- Once it cools, remove the butcher paper and liner from the design.
Hurray! You have done your project perfectly. Enjoy it and try more projects by yourself.